

Learn how to effectively test mobile payments on iOS, covering setup, security, automation, and troubleshooting with practical examples and tools.
Introduction
Testing mobile payments on iOS devices presents unique challenges and opportunities for developers and quality assurance teams. As mobile transactions continue to grow in volume and complexity, ensuring that payment systems function flawlessly is paramount.
iOS devices represent a significant share of the mobile market, and their users are typically active in e-commerce. Ensuring that your payment systems are optimized for iOS not only enhances user satisfaction but also bolsters the security and integrity of the transaction process. With Apple’s stringent app guidelines and the intricacies of its hardware, thorough testing is crucial to achieving a seamless payment experience for end-users.
Testing mobile payments on iOS is fraught with specific challenges:
- Device and OS Fragmentation: Different models of iPhones and iPads, along with various versions of iOS, can affect the behavior of payment apps.
- Security Constraints: iOS has strong security features that can complicate the testing of payment processing.
- User Interface Variations: Ensuring a consistent payment experience across different device sizes and resolutions requires meticulous UI/UX testing.
By addressing these challenges head-on, teams can ensure that their payment solutions are not only compliant with iOS standards but are also strong and user-friendly.
Setting Up the Test Environment
Before delving into the specifics of testing mobile payments on iOS, establishing a strong test environment is essential. This environment should closely replicate real-world conditions to ensure that the testing outcomes are as accurate and useful as possible.
Configuring iOS Devices for Payment Testing
To start, you’ll need access to iOS devices with various configurations. This includes different models and versions of iOS to cover a broad range of scenarios. Here are the steps to prepare these devices:
- Device Selection: Gather a variety of iOS devices, such as different models of iPhones and iPads, to test across multiple screen sizes and hardware capabilities.
- OS Versions: Install different versions of iOS on these devices to check compatibility across updates and ensure backward compatibility.
- Network Settings: Configure network settings to mimic different connectivity environments like Wi-Fi, 4G, and 5G.
Required Tools and Accounts
Several tools and accounts are crucial for a comprehensive testing setup:
- Apple Developer Account: Necessary for deploying test apps on iOS devices and accessing developer resources like beta software and advanced app capabilities.
- Payment Gateway Test Accounts: Sign up for sandbox accounts on payment platforms like PayPal, Stripe, or Square to test transactions without affecting real accounts.
- Xcode and Simulator: Use Xcode to develop and test applications. The iOS Simulator in Xcode is particularly useful for initial functional testing before moving on to physical devices.
Sandbox Testing Configuration
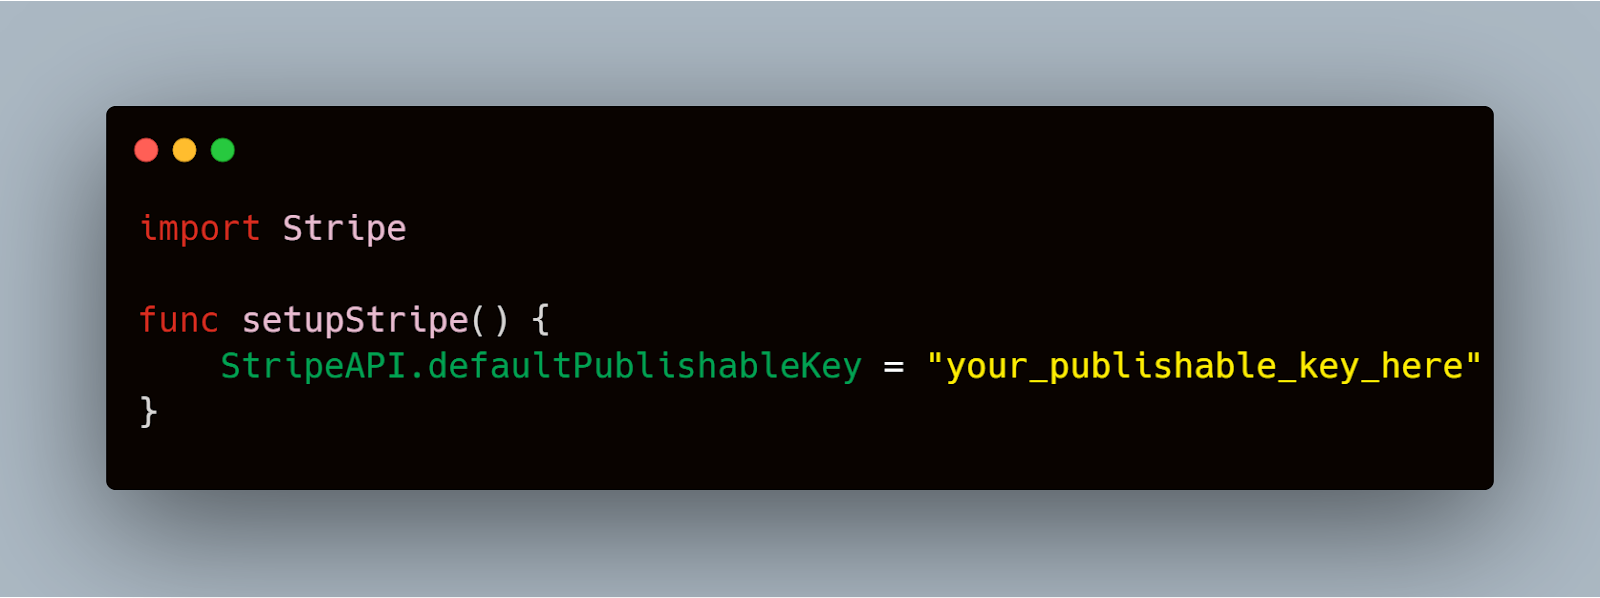
Apple provides a Sandbox testing environment for app developers, which is essential for testing in-app purchases, including mobile payments. Here’s how to set it up:
- Create Sandbox Tester Accounts: In your Apple Developer account, create tester profiles that mimic real user accounts but operate in a controlled sandbox environment.
- Configure Test Payments: Within your app’s payment code, ensure that transactions point to the sandbox environment during testing to avoid actual charges.
- Automate Receipt Validation: Implement automated scripts to validate transaction receipts, ensuring they are processed correctly by your application.
Here is a simple example of configuring a payment gateway using a sandbox account in Swift:
Swift

This code snippet outlines the basic setup and handling of in-app purchases using StoreKit, Apple's framework for managing purchases from within apps, which is crucial for mobile payment testing.
By meticulously setting up your test environment as described, you're ensuring that the mobile payment functionality in your iOS app is tested under conditions that mirror real-world usage as closely as possible, thus paving the way for smooth and secure transactions for your users.
To streamline the setup of diverse testing environments necessary for iOS devices, Mobot can be employed to automate these configurations. This use of automation ensures consistent testing conditions across various device models and OS versions, eliminating manual setup errors and significantly reducing preparation time. By simulating different user environments, Mobot ensures that the application performs well under a variety of real-world conditions, which is crucial for the accurate assessment of mobile payment functionalities.
Integration Testing for Payment Gateways
Integrating and testing payment gateways is a crucial aspect of ensuring that your iOS app handles transactions correctly.
Choosing a Payment Gateway
Selecting the right payment gateway is pivotal for your app’s success. Consider factors like transaction fees, supported payment methods, and geographical availability. For iOS, popular choices include Stripe, PayPal, and Apple Pay. Each has its own set of integration tools and testing environments, which are critical for a seamless user experience.
Setting Up Payment Gateway Integration
Here's how you can integrate a payment gateway like Stripe into your iOS application:
- Register with the Gateway: Create an account on Stripe and set up your merchant details to get your API keys.
- Install the SDK: Integrate the Stripe SDK into your iOS project using Swift Package Manager or CocoaPods.
- Configure the SDK: Initialize the Stripe client with your API keys as follows:
Swift
Testing Payment Gateway Integration
Once the gateway is integrated, it's essential to conduct thorough tests to verify that it functions as expected. Here’s a typical testing approach:
- Use Test Credentials: Ensure that you are using sandbox or test credentials provided by the payment gateway to avoid real charges.
- Simulate Transactions: Perform transactions using test credit card numbers supplied by the gateway to simulate different scenarios like successful payments, declined transactions, and network failures.
- Verify Responses: Check the responses returned by the gateway to ensure they are handled correctly by your app. For instance, successful transactions should proceed to a confirmation screen, while failures should prompt an error message.
Here is an example of how to handle a payment intent with Stripe in Swift:

This code snippet demonstrates how to create a payment intent using the Stripe SDK, handle the response, and deal with different outcomes of the payment process.
By following these steps and using the provided code examples, you can ensure that your integration of payment gateways into your iOS app is not only successful but also strong and secure, providing a reliable foundation for handling mobile payments.
UI/UX Testing of Payment Flows
Ensuring a seamless user interface (UI) and user experience (UX) in mobile payment flows is crucial for maintaining user trust and satisfaction.
Checklist for UI Elements in Payment Flows
To begin, create a detailed checklist for all UI elements involved in the payment process. This includes:
- Input Fields: Ensure that all input fields for payment information (such as card number, expiration date, and CVV) are easily accessible and formatted correctly.
- Buttons and Gestures: Test the responsiveness of buttons and gestures, ensuring that actions like tapping a 'Pay Now' button result in immediate and visible feedback.
- Error Handling: Verify that the app provides clear, helpful error messages for payment failures or data entry mistakes.
- Visual Feedback: Implement loading indicators or animations to inform users that their payment is being processed.
Automated Scripts to Validate User Experience Consistency
Automating the testing of UI/UX can save time and increase the accuracy of your results. Here’s an example of how you might automate the testing of a payment form using XCTest for an iOS app:
Swift
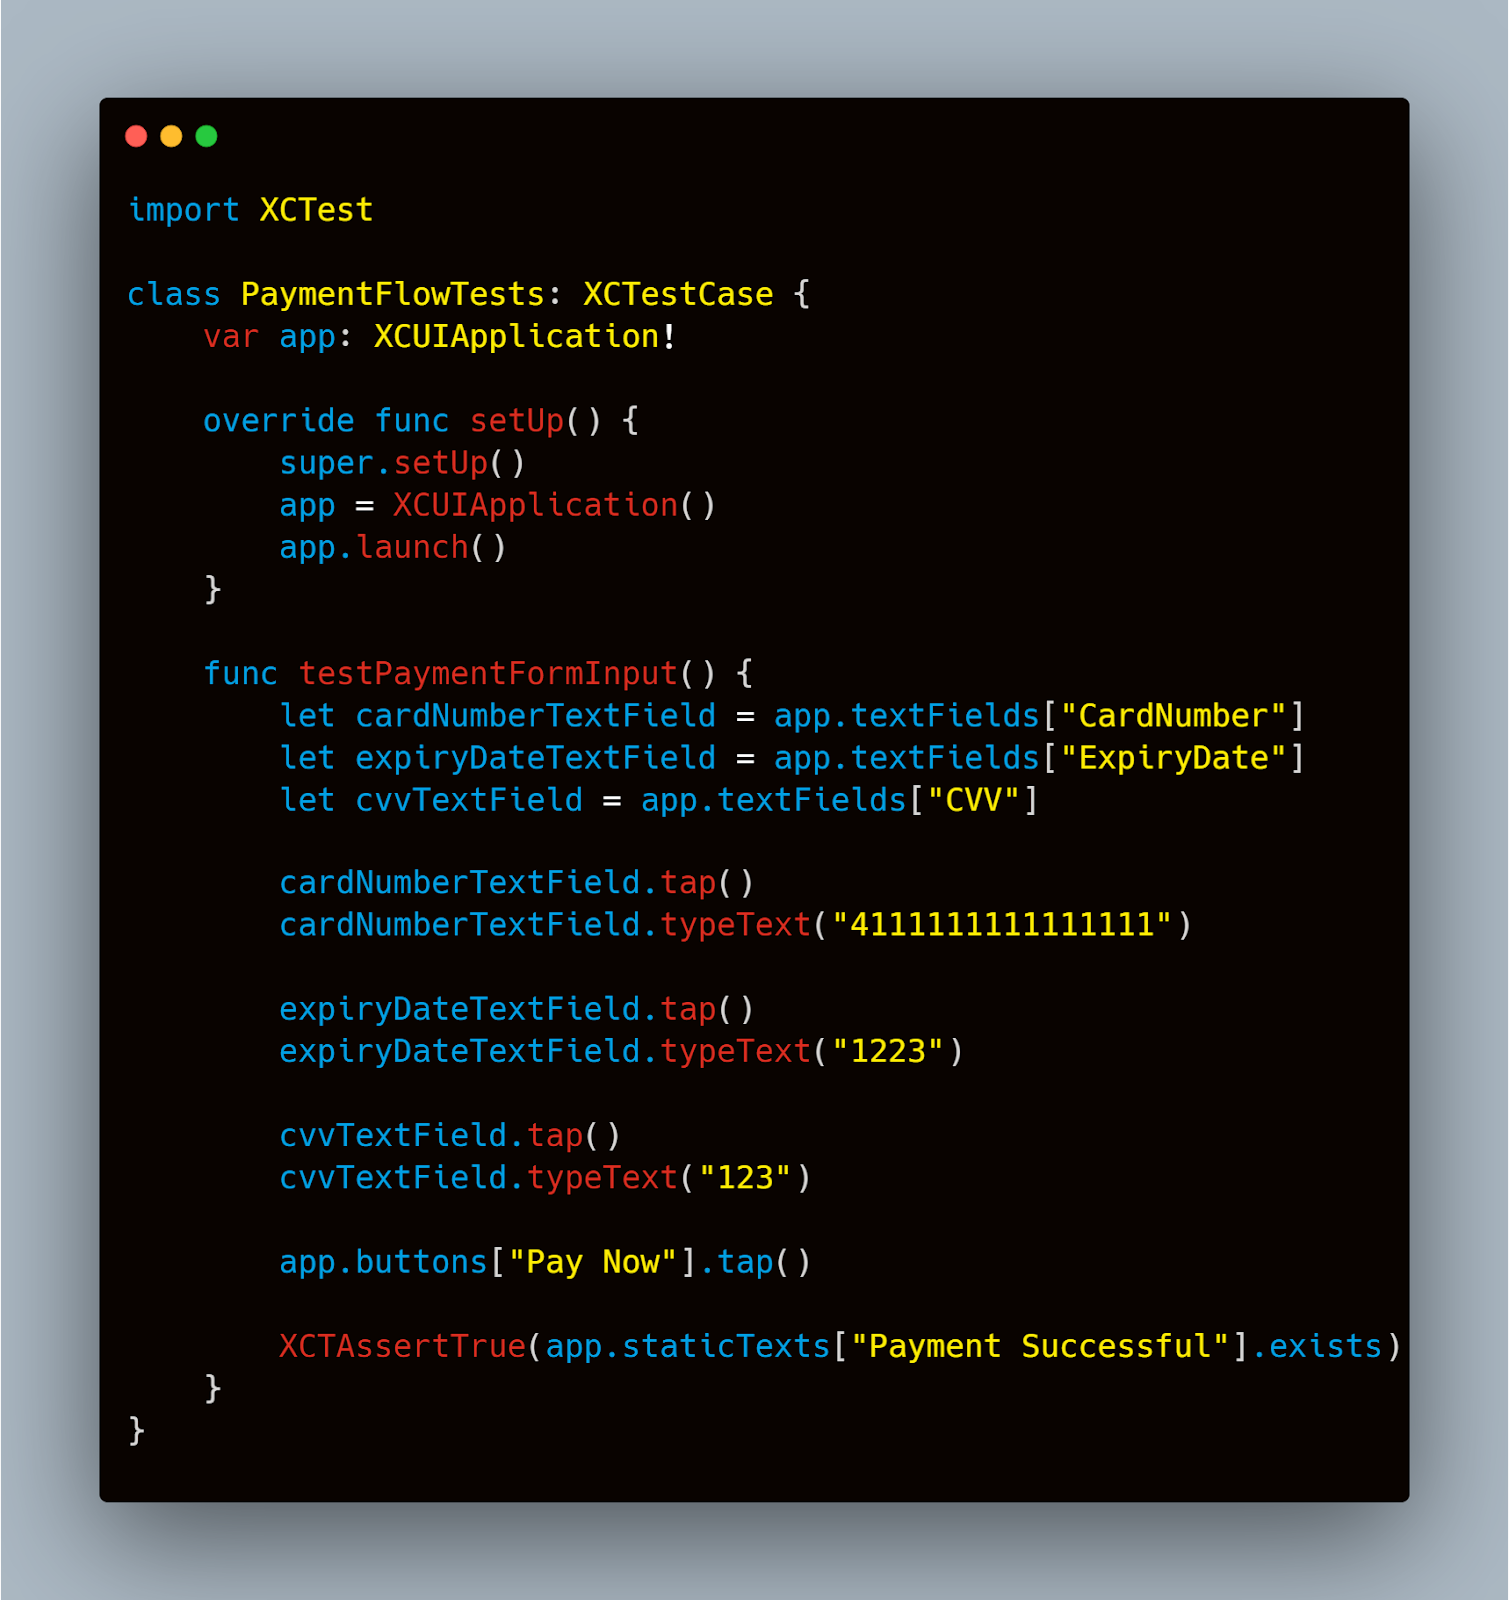
This script performs a series of actions in the iOS simulator, mimicking a user entering payment details and submitting them. It checks for a success message to ensure the payment process is completed as expected.
For UI/UX testing, Mobot automates the interaction with the app’s interface to ensure that all UI elements are responsive and function as intended across different device resolutions and orientations. This helps in identifying any discrepancies in the user interface that could affect user experience. Automating these tests with Mobot not only speeds up the process but also enhances the accuracy of repetitive UI testing tasks, ensuring a polished and user-friendly interface.
Incorporating Feedback from Usability Testing
It's also vital to incorporate feedback from real user testing sessions. Observing users as they navigate the payment flow can provide invaluable insights into areas where the UI/UX may be lacking. Common feedback might include confusion over button placements, difficulties in entering payment information, or misunderstandings caused by the app’s feedback messages.
Integrating this feedback and iteratively refining your app’s UI/UX design will ensure a smoother payment process for end-users. By focusing on detailed, methodical testing and validation of every element in the payment flow, you can enhance user satisfaction and minimize the risk of transaction abandonment.
Security and Compliance Testing
Security Protocols to Test
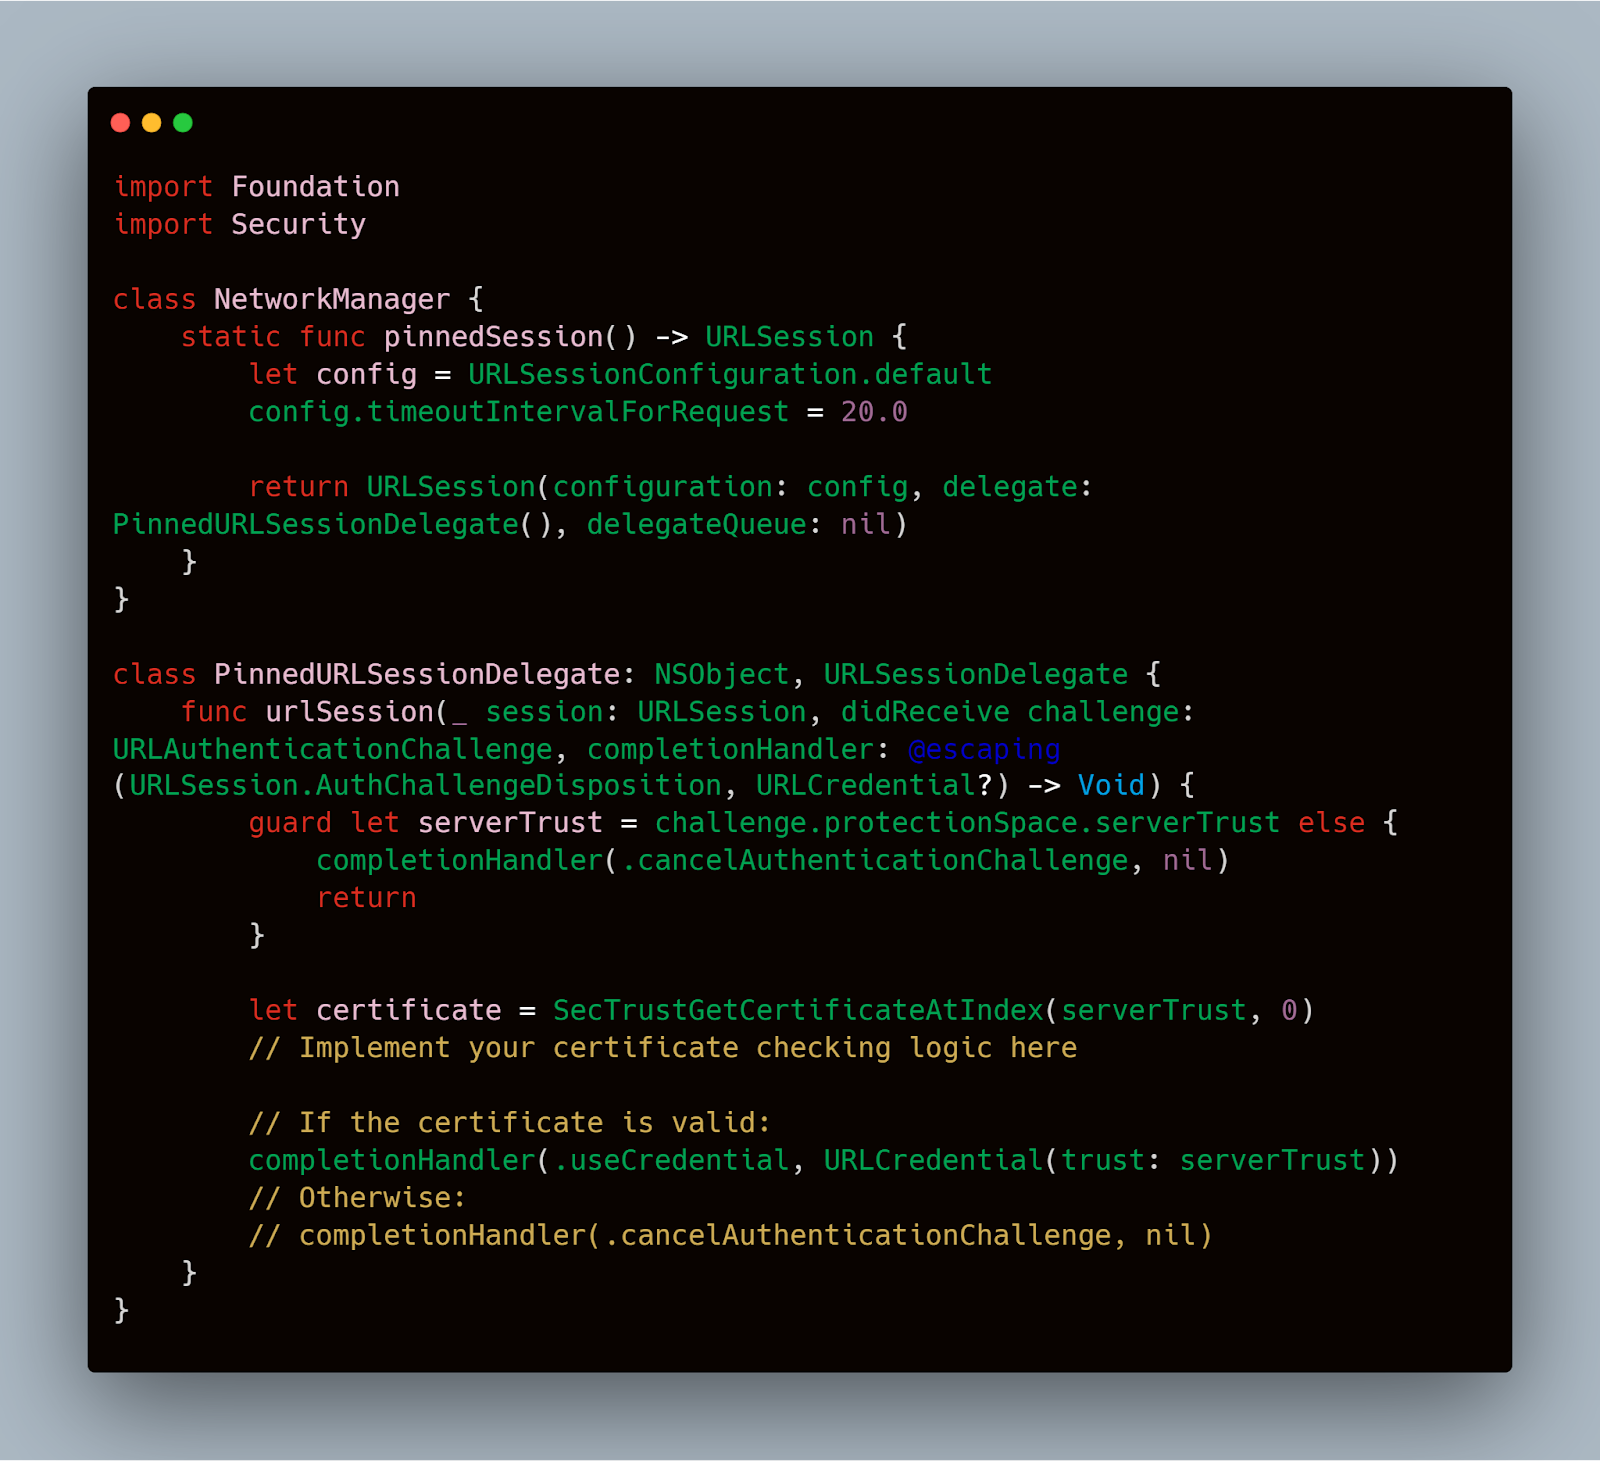
When testing mobile payments, several security protocols must be rigorously validated:
- SSL/TLS Implementation: Verify that your app uses strong SSL/TLS protocols for all communications. Use tools like OpenSSL to test SSL certificates and configurations on your server.
- Data Encryption: Ensure that all sensitive data, including credit card information and personal details, are encrypted both in transit and at rest. Testing should include validation of encryption algorithms and key management practices.
- Authentication and Authorization: Test authentication mechanisms thoroughly. Implement and verify multi-factor authentication (MFA) where applicable.
Here's a basic example of implementing SSL pinning in Swift to enhance security during network communications:
Swift
Compliance Requirements
Adherence to compliance standards such as PCI DSS (Payment Card Industry Data Security Standard) is mandatory for any app handling credit card transactions. Here’s what you need to test:
- Storage of Cardholder Data: Ensure no sensitive cardholder data is stored on the device unless necessary and properly secured.
- Access Controls: Test access controls rigorously to ensure that only authorized users can access sensitive payment functions.
- Audit Trails: Implement and test logging mechanisms that record payment transactions and user activities to create an audit trail.
Testing for Compliance
Compliance testing often involves automated and manual reviews to ensure all standards are met. Tools like OWASP ZAP can be used to identify vulnerabilities in web applications, which can also be adapted for mobile app testing.
Incorporating these security practices and compliance checks in your testing strategy will not only safeguard your application against potential threats but also build trust with your users by ensuring their data is handled securely and responsibly.
Integrating Mobot into your testing process can significantly streamline the verification of compliance and security standards. Mobot's automated testing capabilities allow for routine security checks that can be executed with each software release, ensuring that your application remains compliant with the latest security standards and regulatory requirements. This helps maintain a rigorous testing regime and reduces the human resource needs associated with manual testing.
Performance and Load Testing
Tools and Methods for Simulating High-Volume Transactions
For effective performance testing, you need to simulate realistic transaction volumes. Here are some tools and methods suited for this purpose:
- Apache JMeter: A popular tool for load testing, JMeter can simulate multiple users hitting your server at the same time. It is useful for understanding how your payment gateway handles high traffic.
- Xcode Instruments: Use Xcode’s built-in Instruments tool to monitor an app’s memory usage, CPU load, and network usage in real time.
- TestFlight: Before full deployment, use TestFlight to distribute your app to a broader audience to observe performance under more natural conditions.
Example Scenario: Testing Payment Transaction Load
Here's how you might set up a test scenario using Apache JMeter to simulate high-volume transactions on an iOS payment app:
- Configure JMeter: Set up a test plan in JMeter that replicates a series of payment transactions, mimicking a typical user payment journey from login to transaction completion.
- Add Users: Define the number of concurrent users (threads) and the rate at which new users start the process.
- Execute and Monitor: Run the test and monitor the results. JMeter will provide you with detailed reports on response times, error rates, and throughput.
Analyzing and Interpreting Performance Data
Analyzing the data from your tests will help identify bottlenecks and performance issues. Focus on:
- Response Times: Long response times might indicate issues with your server’s capacity or with the payment processing itself.
- Error Rates: High error rates can suggest problems with the server or the integration with the payment gateway.
- Resource Usage: Look for any unexpected spikes in CPU or memory usage, which could compromise the app’s stability.
Here’s an example of a simple XCTest that measures the response time for a payment transaction:
Swift

This test uses XCTest’s measure method to track how long the processTransaction method takes to execute, helping identify potential slowdowns in processing payments.
By implementing the outlined strategies and using the tools and code examples provided, you can ensure that your iOS application delivers a fast, reliable payment experience even under the most demanding conditions. This will not only enhance user satisfaction but also ensure the strength of your payment system during peak usage times.
Localization and Accessibility Testing
Localization Testing for Payment Systems
Localization testing ensures that your app meets the cultural, linguistic, and legal requirements of different markets. It involves more than just translating text; it includes:
- Currency Handling: Ensure the app correctly processes different currencies and formats numbers according to local conventions.
- Date and Time Formats: Dates and times should be displayed in the local format, which varies significantly across regions.
- Legal Compliance: Payment and data privacy regulations can vary by country, such as GDPR in Europe or CCPA in California.
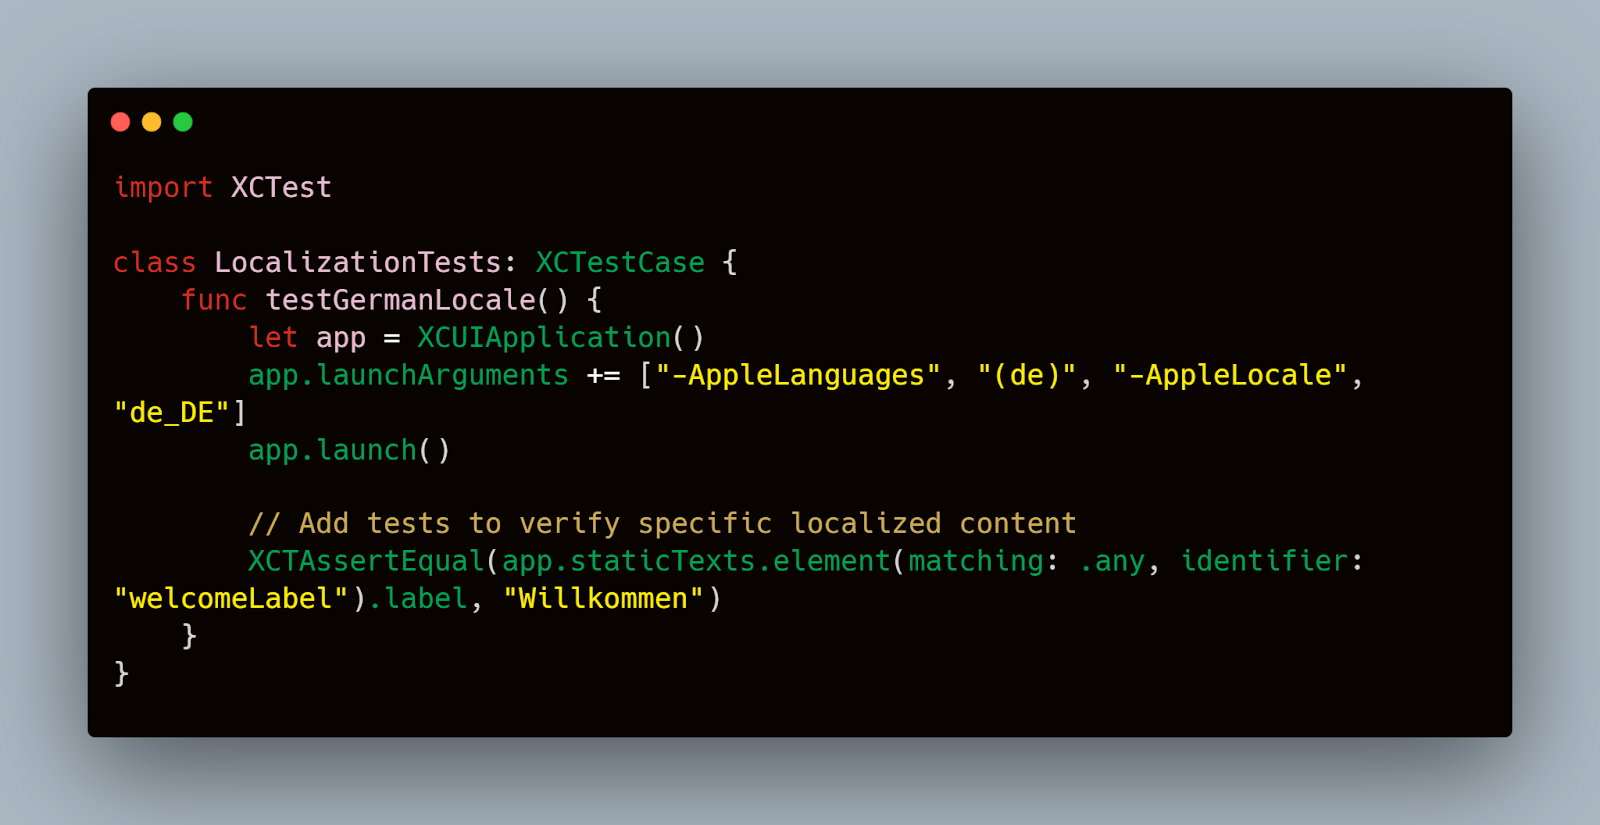
To conduct localization testing, use iOS’s built-in internationalization features and consider the following steps:
- Locale Simulation: Test your app with different locale settings to simulate regional behaviors using Xcode’s scheme editor to modify the app’s locale and region settings.
- Automated Screen Checks: Use tools like snapshot testing to verify that screens render correctly in different languages without text overflow or truncation.
Here is a simple code snippet using XCTest to simulate different locales in your tests:
Swift
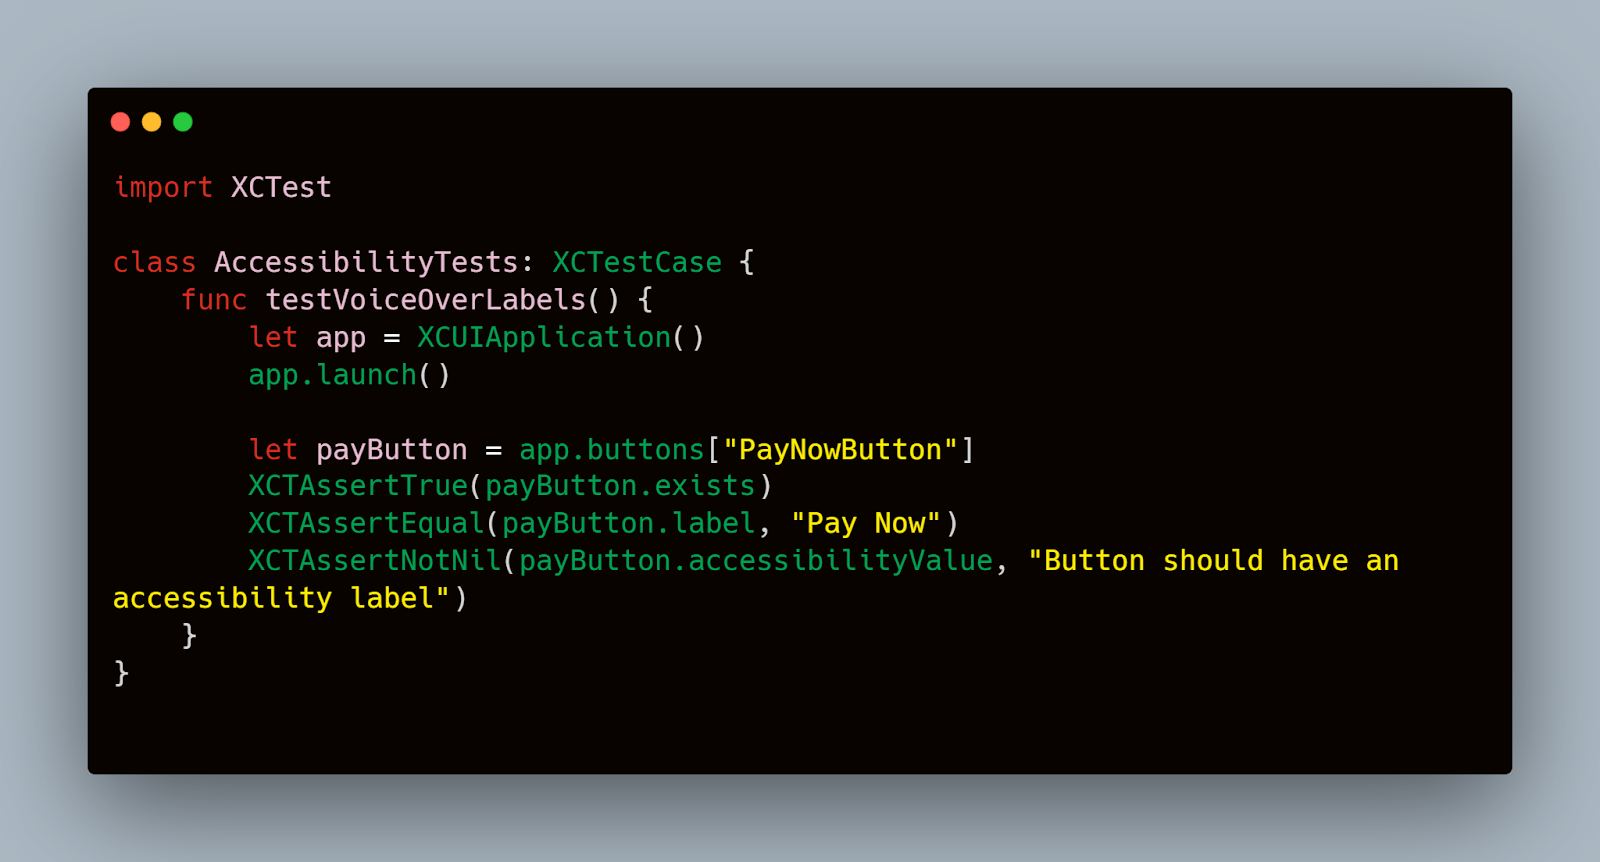
Accessibility Testing for Payment Systems
Accessibility testing ensures that your app is usable by people with disabilities, such as those who have visual impairments or limited motor skills. This includes:
- VoiceOver Compatibility: Ensure that screen readers can accurately read out payment information and alerts.
- Touchable Area Size: All interactive elements should have a minimum touchable area of 44x44 pixels as per Apple’s guidelines.
- Color Contrast: Text and important graphical elements should have sufficient contrast against the background to be easily distinguishable.
Use iOS’s Accessibility Inspector to manually check accessibility issues and automate testing with tools like XCTest. Here’s how you could automate a test for VoiceOver:
Swift
By focusing on localization and accessibility in your testing process, you not only enhance the user experience across different regions and user groups but also ensure compliance with international standards and laws, thereby expanding your app's potential market and user base significantly.
Troubleshooting Common Issues
Common Payment Integration Issues
Issue 1: Failed Transactions
- Symptom: Transactions fail intermittently without a clear error message.
- Possible Causes: Network issues, incorrect payment gateway settings, or bugs in the transaction handling logic.
- Solution: Implement comprehensive logging around the payment process to capture all failure points. Ensure that your network conditions are stable during testing. Review and test your payment gateway configurations thoroughly.
Issue 2: Slow Transaction Processing
- Symptom: Users experience significant delays during payment processing.
- Possible Causes: Inefficient code, slow payment gateway responses, or high server load.
- Solution: Optimize your code to ensure it is efficient and strong. Consider asynchronous processing if the payment gateway supports it. Use performance profiling tools to identify and fix bottlenecks.
Common UI/UX Issues
Issue 1: Input Field Errors
- Symptom: Users enter invalid data into payment fields, which are not adequately validated.
- Possible Causes: Lack of proper validation checks or unclear input field requirements.
- Solution: Implement client-side validation and provide clear, immediate feedback for incorrect inputs. Ensure that all fields are tested for various input scenarios.
Issue 2: Inconsistent UI Elements
- Symptom: Payment UI looks different on various devices or OS versions.
- Possible Causes: UI not optimized for different screen sizes or resolutions.
- Solution: Use Auto Layout for your views in iOS to ensure consistency across different devices and orientations. Regularly test on multiple devices.
Here’s a simple example of how to implement logging in Swift for a payment transaction:
Swift
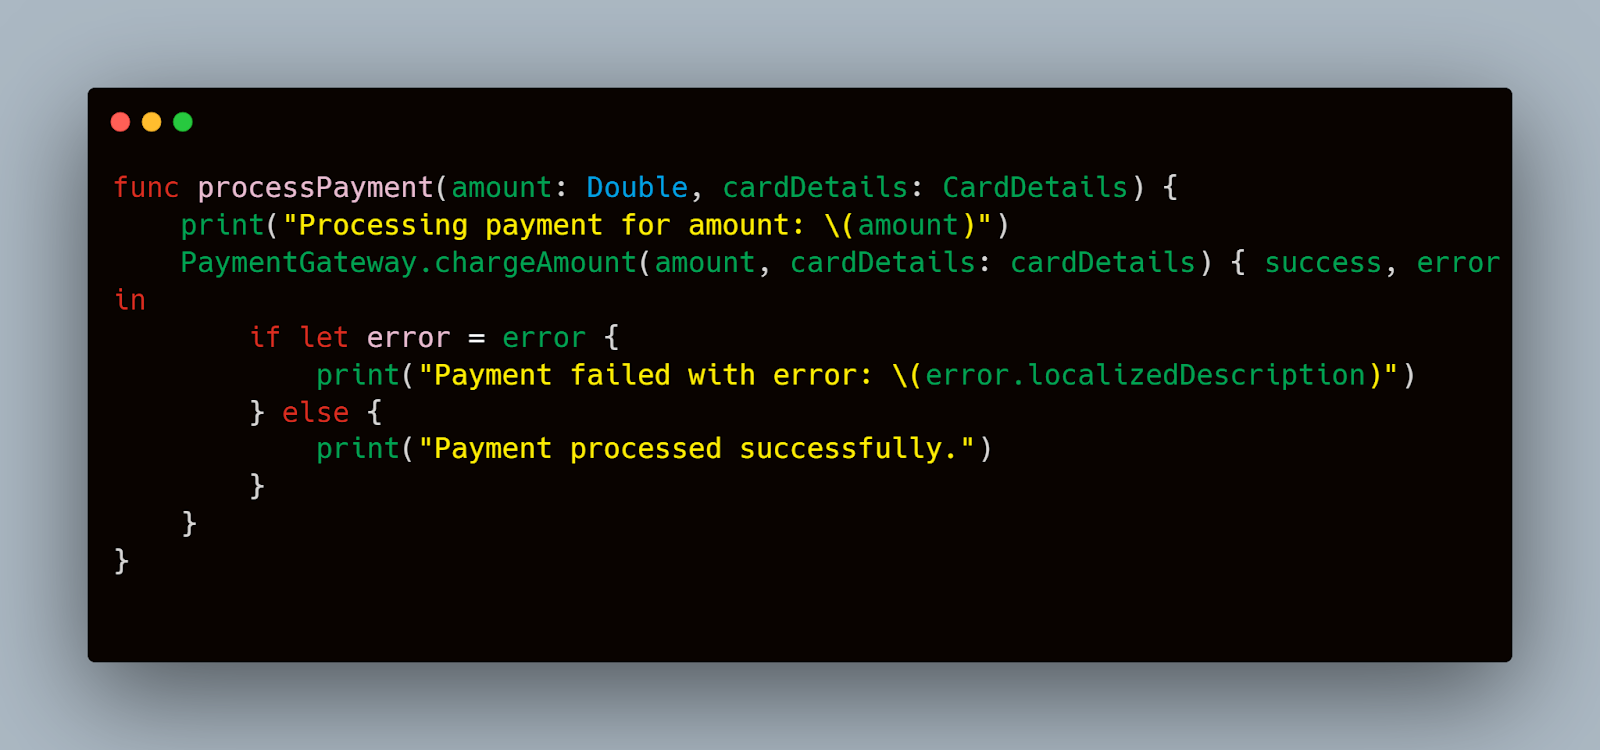
In this snippet, each step of the payment process is logged, providing clear visibility into the flow and any potential errors.
By anticipating these common issues and implementing the suggested solutions, teams can significantly reduce the incidence of problems during live deployments, ensuring a smoother, more reliable payment experience for users. This proactive approach to troubleshooting not only improves the quality of your iOS app but also enhances user trust and satisfaction.
Mobot's advanced testing capabilities can be particularly useful in diagnosing and resolving UI/UX issues that are often elusive in manual testing. By automating the reproduction of errors across various device configurations, Mobot helps pinpoint the exact conditions under which issues occur. This is crucial for addressing problems that are not consistently replicable, such as intermittent UI glitches or input validation errors that only appear under specific circumstances.
For instance, Mobot can simulate user interactions on different versions of iOS devices to test how UI elements behave under each version. This helps ensure that your app provides a consistent and seamless user experience across all supported devices, thus reducing user complaints and increasing satisfaction.
By leveraging Mobot in the troubleshooting process, teams can enhance their diagnostic accuracy and efficiency, leading to quicker resolutions and a more robust mobile payment solution.
Automating Mobile Payment Testing
Tools and Frameworks for Automation
Several tools can be leveraged to automate testing of mobile payments:
- XCTest: Apple’s native testing framework that integrates seamlessly with Xcode, allowing for unit tests, UI tests, and performance tests.
- Appium: A cross-platform testing tool that can automate tests for both iOS and Android apps using the same API.
- Jenkins: A continuous integration tool that can automate the entire development process from build to deployment, including automated tests.
Setting Up Automated Tests with XCTest
XCTest provides a strong environment for writing and running automated tests directly within Xcode. Here’s how you can set up a simple automated test for a payment process in an iOS app:
- Create a New XCTest Case: This is a class that will contain all your test methods.
- Implement Test Methods: These methods will simulate user interactions and check for correct outcomes.
Here’s an example of a UI test for a payment form using XCTest:
Swift
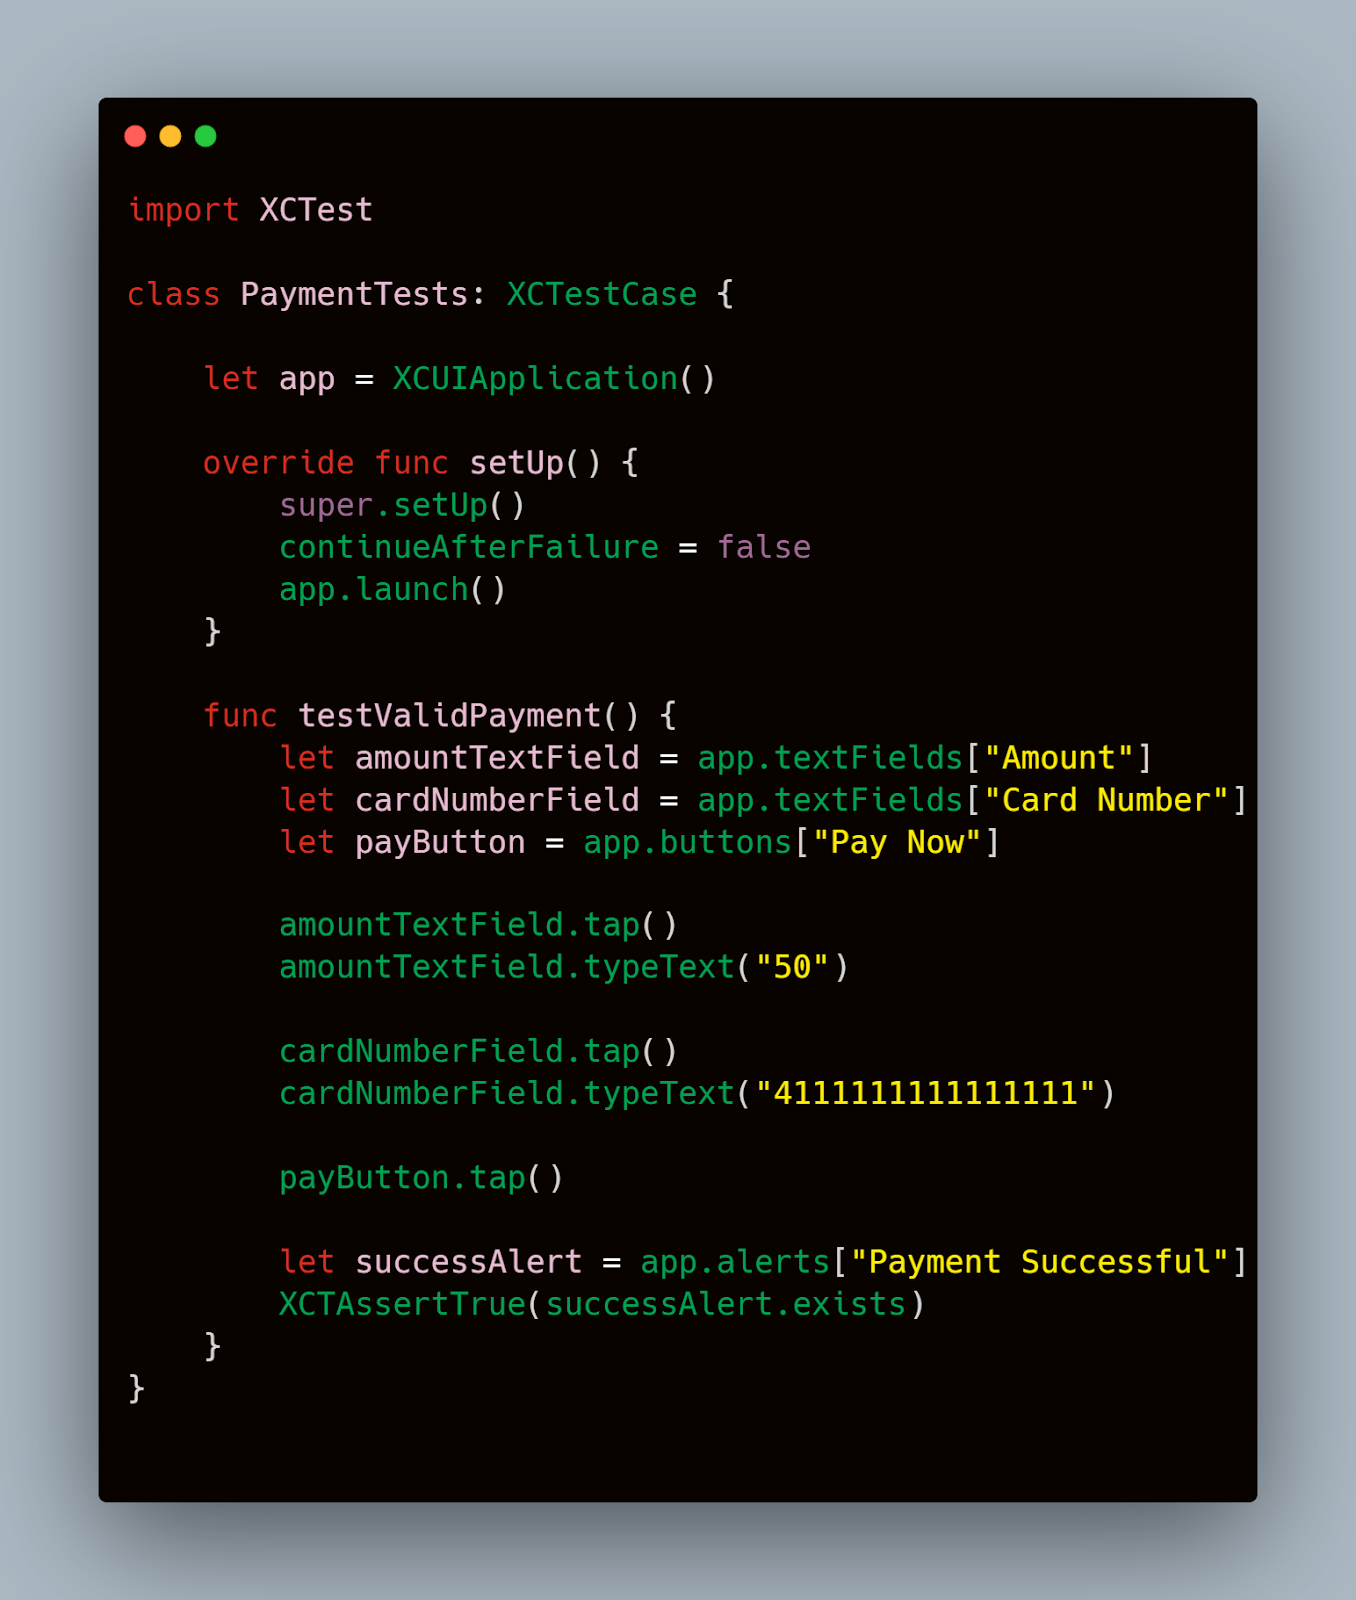
This test simulates a user entering a payment amount and card number, and then pressing the 'Pay Now' button. It checks whether a success alert is displayed, indicating that the payment was processed correctly.
Continuous Testing with Jenkins
Integrating Jenkins for continuous testing allows you to automate your tests to run every time there is a change in your codebase. Here’s a basic setup:
- Install Jenkins and Configure Your Project: Set up a new project in Jenkins and link it to your repository.
- Create a Build Pipeline: Configure the pipeline to build your app and run tests whenever there is a commit to the repository.
- Monitor Test Results: Jenkins provides detailed reports on the outcome of each test run, helping you quickly identify issues.
By implementing automated testing strategies using tools like XCTest and Jenkins, you can ensure that your mobile payment functionalities on iOS are thoroughly tested across different scenarios and configurations. This not only saves time but also significantly reduces the risk of human error, ensuring that your app delivers a seamless and secure payment experience to users.
Mobot's strong automation features can be fully leveraged to streamline the entire testing cycle for mobile payments. From executing basic transaction tests to handling complex scenarios involving multiple integrated systems, Mobot can automate these processes comprehensively. This not only speeds up the testing cycles but also ensures a thorough evaluation of every component involved in the mobile payment process.
Conclusion
Thorough testing of mobile payments on iOS is crucial for ensuring the security, efficiency, and user satisfaction of your app. By following the structured approach outlined in this guide—from setting up a strong test environment and integrating payment gateways, to automating tests and troubleshooting common issues, you can significantly enhance the reliability and performance of your payment systems.


.jpg)


.jpg)